Using the Framebuffer on CentOS 7.4
This post will be a quick start example of getting started with the framebuffer. I didn't find anything that laid out how to actually run a framebuffer so I'm writing this with the assumption that you want to learn how framebuffers work but first need to actually get it set up.
The first step is to install the libvncserver library:
yum install libvncserver-devel
Now we can download the example code. The radon header file is required as well.
wget https://raw.githubusercontent.com/LibVNC/libvncserver/master/examples/server/example.c
wget https://raw.githubusercontent.com/LibVNC/libvncserver/master/examples/server/radon.h
Now we can compile the example.
gcc example.c -lvncserver
Then we can run the binary that we generated.
./a.out
This should output something like:
01/07/2023 13:57:03 Listening for VNC connections on TCP port 5900
01/07/2023 13:57:03 Listening for VNC connections on TCP6 port 5900
01/07/2023 13:57:03 Listening for HTTP connections on TCP port 5800
01/07/2023 13:57:03   URL http://127.0.0.1:5800
01/07/2023 13:57:03 Listening for HTTP connections on TCP6 port 5800
01/07/2023 13:57:03   URL http://127.0.0.1:5800
Port 5900 will need to be exposed through the firewall for us to be able to connect to it.
We can use VNC Viewer to connect to our framebuffer now. You can download the standalone version of VNC viewer so you don't have to install anything.
https://www.realvnc.com/en/connect/download/viewer/
Now you can navigate to the following url with VNC Viewer:
192.168.18.30:5900
We should now see our framebuffer example up and running:
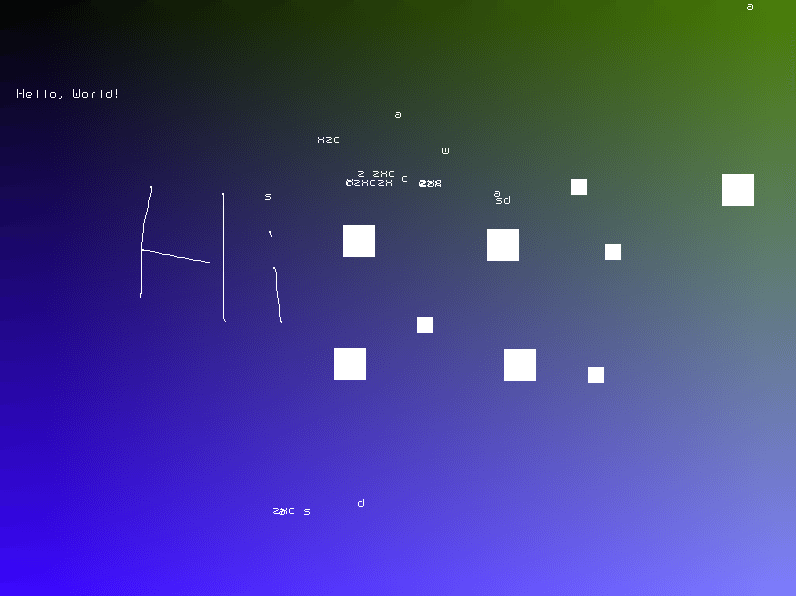
This example shows how to display things in the framebuffer and also how to deal with both mouse input and keyboard input. The large squares are scroll downs and the small squares scroll ups. There is also text that you can type at the cursor position.
With that working, now I can actually start learning how to use the framebuffer.